

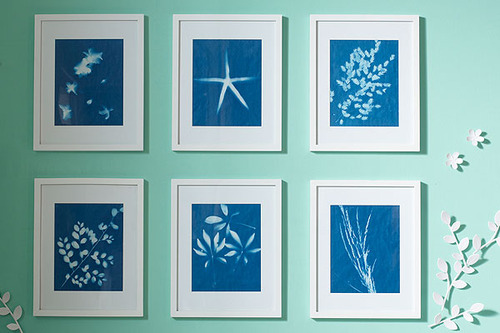
Summertime is my personal fav time of year, so I decided it was time to re-cap one of my most popular all-time DIY projects, just in time for the summer SUN.

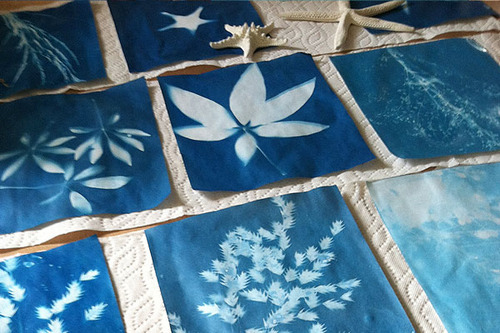
The sunprints I made several years ago have decorated photo sets, furniture showrooms, and of course several different rooms + corners of my home. They are a fun craft to do with kids (of any age). It's like magic.
Here's the step-by-step HOW-TO:
Step 1 – Gather the items you need
- Sun Print paper (I got mine from here)
- An acrylic sheet (the Amazon sunprints come with one in the package)
- Cardboard or paper towel
- A tub of cool water (the kitchen sink will do)
- Interesting shapes + objects from nature (branches, shells, etc)
- Sun Print paper (I got mine from here)
- An acrylic sheet (the Amazon sunprints come with one in the package)
- Cardboard or paper towel
- A tub of cool water (the kitchen sink will do)
- Interesting shapes + objects from nature (branches, shells, etc)
Step 2 – Arrange nature elements on a piece of sun paper out of the sunlight.
For best results, arrange your objects on the paper in a dark space indoors (I used a pantry closet).Direct sunlight causes quick exposure of the paper, so you want your elements arranged before you bring it outside.
Step 3 – Place an acrylic sheet (ie: plexiglass) on top to flatten and hold your items in place on the paper.
Once your items are placed on the paper, cover them with an acrylic sheet to keep them secure as you Use an acrylic sheet when making prints of flat or almost-flat objects to help sharpen the edges between blue and white in your print. Ambient sunlight outdoors will find its way underneath the edges of your objects if they are not pressed firmly to the paper, and you will get sun prints with blended contrasts.
Step 4 – Take your sun print composition outside and place it in direct sunlight for 2-5 minutes.
The areas of the paper exposed to the sun will fade from blue to white. When you see most of the color disappear from the paper, your print has been fully exposed. If no direct sunlight is available, don’t worry – just expose your print a little longer and wait for the same fading effect. Under cloud cover, the process will take 5-20 minutes depending on the thickness of the clouds.
The areas of the paper exposed to the sun will fade from blue to white. When you see most of the color disappear from the paper, your print has been fully exposed. If no direct sunlight is available, don’t worry – just expose your print a little longer and wait for the same fading effect. Under cloud cover, the process will take 5-20 minutes depending on the thickness of the clouds.
Step 5 – Rinse your paper in cool water. Watch the white turn into blue and the blue turn into white.
It’s magical! To get the deepest blue, leave the paper in the water for a while: 1-5 minutes.
It’s magical! To get the deepest blue, leave the paper in the water for a while: 1-5 minutes.
Step 6 – Lay your sun print flatly on paper towel or cardboard and allow it to dry.
Putting it on something absorbent will help to avoid the formation of water spots by drawing the water away from the sun print paper. By the time the water has dried, you will have a vibrant blue sun print!
Putting it on something absorbent will help to avoid the formation of water spots by drawing the water away from the sun print paper. By the time the water has dried, you will have a vibrant blue sun print!

It's the perfect DIY craft project for Summer.
Read more of the how-to here.
I hope you're enjoying the season! Comment below + share your favorite summer pastime.
xo
patti


