BeSo chic. BeSo organic. BeSo YOU. ...thoughts on design, fresh interiors + style from a photo stylist.

Thursday, April 23, 2020

spring vibes + fresh finds

Hey all!
How are you holding up during this unconventional time? Hoping this post finds you safe at home. I wanted to share a few favorite finds and let you know what I've been up to, hoping to inspire you to create fresh spaces in your home despite the chaos going on around us. Thankfully, I've been busy collaborating with Isabella Style {see my recent blog posts here.} I miss being in the Isabella shop + studio, but grateful for an amazing creative team of women to connect with weekly on Zoom and daily via group texts. I've been pinning ideas, dreaming of minimal style for my interior + current loungy vibe. Here's a recent moodboard which gives you a sense of my style dreams (follow along on Instagram for more of what I'm lovin' lately)...


The mood is organic, fresh, simple. Do-able luxury with edited details. Currently craving French-inspired herringbone floors (a possible DIY in my future?). I've also been purging, streamlining and spring cleaning. I started with my porch and outdoor living areas (more spring cleaning + outdoor inspo here). Take a peek at my de-pollened porch which now serves as a family gathering spot, work-from-home office and study niche.


I also re-styled the living area for a bit of a re-fresh (for more interior ideas + inspiration link here)...


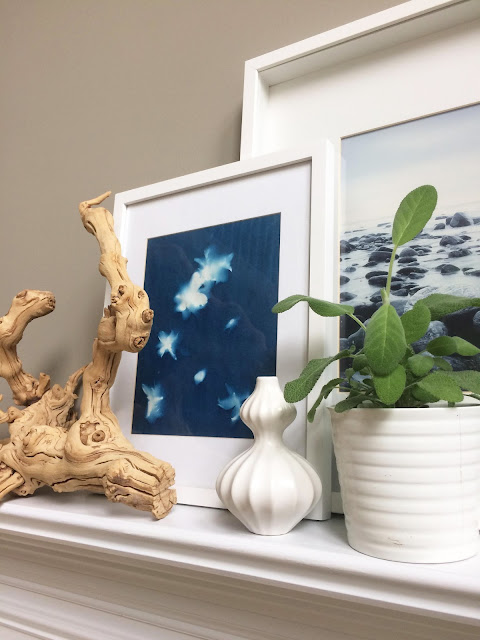
I cleared everything off the mantel. Added an organic branch and scavenged through old watercolor tablets to find one to frame. I love the color mix and always love the subtle statement of a watercolor. Isn't it fun how a mat and frame make any artwork totally legit?


I've been attempting to edit out the clutter and focus on clear surfaces. I've also been diffusing fresh aromas. Lemongrass + Sweet Orange are my go-to essentials. I love this set of essential oils in a cute compact package for tidy storing ... and currently coveting this ceramic diffuser ...


I've also been eyeing a few finds on the Isabella Shopify site, like these stunning abstracts by Kristin Endsley ...


... and this sweet straw bag with tassel, perfect for the spring + summer seasons and for shopping green ... 


... and these jewels from Noble Collective. I'm a sucker for white-on-white layers ...


And of course, I can never get enough candles to light-up the days + nights and create warm + cozy home feels.


What have you been dreaming of lately? ... What ways have you been coping with this time of isolation?  I'm super grateful for spring weather in NC and time outside.  Looking forward to connecting with friends in person again soon.  Until then, always over here dreaming, styling + creating whenever possible. Next up for getting my life in order, my home office (which sadly is currently a hoarder's episode of props and way too much stuff). 

Stay safe! Wishing you health, time for self care, and a little home refreshment.

xo

patti


Friday, June 28, 2019

sun prints : diy


Summertime is my personal fav time of year, so I decided it was time to re-cap one of my most popular all-time DIY projects, just in time for the summer SUN. 


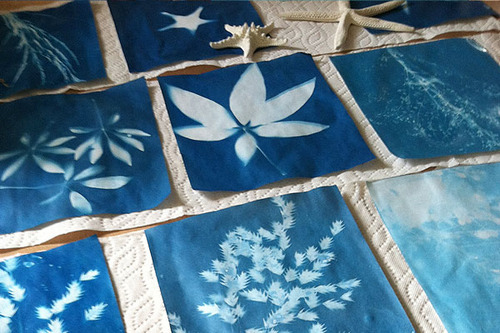
The sunprints I made several years ago have decorated photo sets, furniture showrooms, and of course several different rooms + corners of my home. They are a fun craft to do with kids (of any age). It's like magic.

Here's the step-by-step HOW-TO:

Step 1 – Gather the items you need

Sun Print paper (I got mine from here)

- An acrylic sheet (the Amazon sunprints come with one in the package)
- Cardboard or paper towel
- A tub of cool water (the kitchen sink will do)
- Interesting shapes + objects from nature (branches, shells, etc)

Step 2 – Arrange nature elements on a piece of sun paper out of the sunlight.

For best results, arrange your objects on the paper in a dark space indoors (I used a pantry closet).Direct sunlight causes quick exposure of the paper, so you want your elements arranged before you bring it outside.

Step 3 – Place an acrylic sheet (ie: plexiglass) on top to flatten and hold your items in place on the paper.
Once your items are placed on the paper, cover them with an acrylic sheet to keep them secure as you Use an acrylic sheet when making prints of flat or almost-flat objects to help sharpen the edges between blue and white in your print. Ambient sunlight outdoors will find its way underneath the edges of your objects if they are not pressed firmly to the paper, and you will get sun prints with blended contrasts.
Step 4 – Take your sun print composition outside and place it in direct sunlight for 2-5 minutes.
The areas of the paper exposed to the sun will fade from blue to white. When you see most of the color disappear from the paper, your print has been fully exposed. If no direct sunlight is available, don’t worry – just expose your print a little longer and wait for the same fading effect. Under cloud cover, the process will take 5-20 minutes depending on the thickness of the clouds.
Step 5 – Rinse your paper in cool water. Watch the white turn into blue and the blue turn into white.
It’s magical! To get the deepest blue, leave the paper in the water for a while: 1-5 minutes. 
Young America DIY Sun Prints
Step 6 – Lay your sun print flatly on paper towel or cardboard and allow it to dry.
Putting it on something absorbent will help to avoid the formation of water spots by drawing the water away from the sun print paper. By the time the water has dried, you will have a vibrant blue sun print! 


It's the perfect DIY craft project for Summer. 
Read more of the how-to here

I hope you're enjoying the season! Comment below + share your favorite summer pastime.

xo

patti